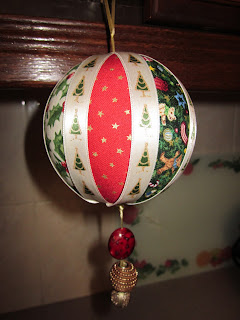
I was NOT going to make any more of the Christmas balls
I thought I had made enough!!
BUT Amanda asked!
SO I thought I would "have-a-go" at showing you how to do it!
You get your polystyrene ball..this is the small size (7cm)
mark the lines...(choose the ones with the marks already on its much easier that way)
Then cut along the lines with a knife
lay the fabric along the cut line
take an old card...I found a blockbuster..any will do
push the fabric into the cut with the card! SEE its easy!
continue to lay the fabric along side the cut and push it in (I found if you start in the middle it "eases" in better)
cut off the excess fabric
lay next piece along side and repeat
when its all covered get your ribbon and start to cover the edges
if it wont "STAY" use a pin to hold it down
I made a loop from the ribbon I used round the ball...held in place with a pin
you can use another colour ribbon and push it into the ball
pins help AND I found dipping in craft glue also helps hold things in place.
SO....GO PLAY (oh add beads etc as you wish!)
Phew! I'm worn out now!! Off to play with the 2nd decoration that was demonstrated on Thursday.
Keep smiling
Diane xx


3 comments:
Now that really is clever, I'd never have thought of doing it like that. I was thinking glue and then trying to deal with the pleats etc etc, this sounds so much easier. I fear I may have to make the long trek to Hobbycraft sometime soon to get the polystyrene balls. What great presents they'd make.
ohhh I might have to go buy some balls...wish i'd seen this sooner have already been to the sewing shop, looked at the balls and couldn't work out what I could do with them, now I know thanks for the tutorial :)
Hi Diane...love your Balls! Are they really that easy to make?! Maybe you should have kept it to yourself and sold them on your Blog!
The Pillows you've made are superb!
Enjoy your 7 days off!
Love Karen xx
Post a Comment